Monday, 4 February 2013

Getting Ready for the Windows

Its been a busy few weeks after the Christmas break. We started in early January by rendering the inside of the house this will be the first layer of air tightness and add extra rigidity and strength to the interior walls.

The rendering was done by a local man Peter, and it took him three days, we were toying with the idea of doing it ourselves but thank God we didn't. We would still be at it !!!


Rendering the Western side wall
 After the rendering was done Michael the architect suggested we white wash the walls, using lime powder, which would brighten up the inside of the house he, as always, was quite correct.


Michael painting the walls

Adam "helping" with painting
While Peter was on site we asked him to scud the exterior walls of the house which is a messy job and could damaged the new windows if they where fitted.


The scudding makes the exterior very dull.
The scudding meant that the temporary boarding around the windows had to be removed. This showed us just how much light will be coming into the house. The scudding was done prior to the scratch coat and final coat of render with will go on to the outside wall. This will have to wait until drier weather.


White washing the interior was a great idea. View into the South-East corner


View into the North-West corner.
We added some temporary lights inside and because of the white wash walls two tube lights was all that was needed to brighten up the inside so that we can now work later on into the day.


Without the lights it would be pitch black inside.
The timber arrived for us to start framing up the interior walls. This was 150mm x 50mm timber which was placed against the wall and will be filled with ridged insulation. The floors will also be attached to the framing. The framing was done with the help of my friend Shabbs who came from the UK to help out in my hour of need, many thanks Shabbs.


The first of many loads to arrive.
Framing up the inside.


The floor joist will rest on the beam which is attached to wall studs
We also had a delivery of my much anticipated Vogalzang Barrel Stove Kit which is made in the U.S. The kit consists of a door, chimney pipe bracket with damper and some legs, you have to supply your own 55 gallon oil drum. We will be using the stove as a temporary heat source in the house using the many bits of timber off cuts which we have saved up.


Took us 20 mins to put together. More info on the stove is available on YouTube.
The stove was heated up outside first which burns off any paint on the drum which could be harmful if burnt inside and any oil residue which may be inside the drum.


10 mins after lighting


20 mins after lighting the heat output is staggering!!!

The stove will be placed inside the house and fixed to the permanent chimney pipe location when the permanent stove arrives the barrel stove will be then used in the garage while I tinker with the replica Cobra car kit which I want to build someday!!


We then started on the central spine wall of the house this will carry a third of the weight of the first floor. The spine wall was made with the engineering expertise of my friend Terry Dales who came from the UK to help, for which I will be eternally grateful. The floor joist where added to the wall beam and the spine wall.


The spine wall was engineered with the help of my friend Terry Dales.
Terry making sure its all level.

We than started laying the floor joist and floor boarding for the first floor. This will help the window installers fit the upstairs windows.


Looking into the South-East corner.


The floor joist can be seen resting on the spine wall top beam
Looking into the North-East corner.
We have made up a temporary staircase to get to the first floor. The staircase has been used before and we have added extra timbers so it could be used with our floor height. It doesn't look it but it is very solid.


View looking down the staircase the hand rail will be added


It is very safe honest!!!
The first floor will be completely joisted and boarded out so the window installer's can fit the windows. These are coming on Tuesday 5th February not a moment too soon.

Thursday, 27 December 2012

Shutting Down For Christmas

This will be the last post for 2012, and what a year !!

We finally finished all the roof tiling, just before we closed up for Christmas.
The South face all finished.


The North face also finished.
 We also have had to close up all the window openings with plywood sheeting. This is to stop the wind, which could cause the roof to be lifted off due to air pressure.


View from the North-West corner


South-West corner


South-East corner
The scaffolding on the west side is now all completed. This gives us access to all sides of the house.

Merry Christmas and have a Happy New Year.

Saturday, 15 December 2012

The Slates are On

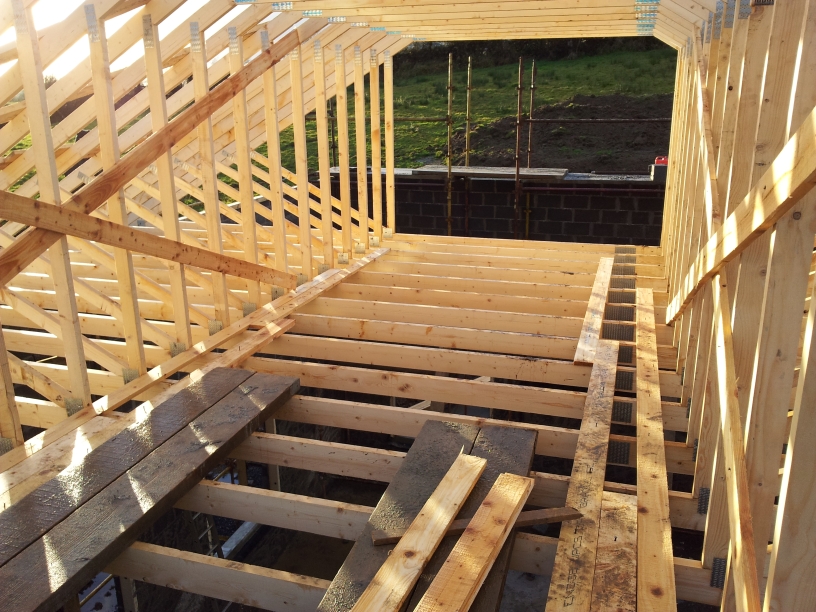
On the 23rd Nov we started putting up the trusses on the roof. The first ones were put up in two's and three's so the roofer can fix them.


A view from inside


The gap at the end

A view of the trusses the wood on the top of them is temporary bracing.


What we achieved in six hours


The roofer has left a gap at each end of about three trusses so the block layers can come back and finish the blocks for the gables from the inside.

The block layers came back on 28th Nov to finish off the gables at each end of the house.


The roofer had put a piece of timber as a guide for the block layer.


The view from the North-West corner.


 On the 30th Nov. the block layers finished on site and took away most of their scaffolding, tools and the beloved telehoist which, as a tool in building the house, has been invaluable. I'll miss it very much as I have said to many people if they win the lottery and are feeling generous please buy me one!!!


Adam and Deen came to help clean up the interior of the house. We took all the spare blocks, pieces of timber and insulation and gave it a good clean.


The inside looking much cleaner


After the top of gables where finished we have had to put up some shuttering and finish them properly with concrete.


Michael adding the temp. shuttering for the top of the gable walls


After the concrete was added the insulation that was used as shuttering as will be cut off level with the wall
The roofer add lots of bracing to the roof this took three days alone


We have used nearly 6000 nail gun nails and ten kilo's of loose nails in the roof. There has been lots of bracing in this roof.

On the 7th Dec. we started measuring up for the vapour membrane to be added to the roof. Before then all the bottom section of the roof was given a coat of wood preservative.


Adding the preservative


Measuring for the vapour barrier


The vapour barrier
 The vapour barrier was fixed and then the roof was counter battened so that there will be a 50mm gap between the vapour barrier and the bottom of the roof slates, this is done for air circulation.


The 50mm counter battens then the slate battens


Adding the slate battens
On the 11th Dec. the slates arrived from Tegral.


The slates are on site.

The battens that the slates are fixed on to took a while to set up because these make a very big difference to how easy it will be to fix the slates on to and the final look of the roof.


The first slates on the roof on the 12th Dec.


The South side roof is done first.
The North side of the house is ready for the slates. As can be seen below we were one truss over this was because we changed our mind about the way the chimney for the stove is coming out of the house its now exiting from the west gable end.


A view from the North West corner.


Friday, 23 November 2012

Finally Ready for the Trusses !!

On the 14th Nov the block layers installed the first window sill into the house. This will make the first substantial connection between the outside leaf and inner leaf of the blockwork walls.

With every new sill being fitted the walls will get progressively stronger.


On the 16th Nov the East wall was up to the start of the gable


View from the North -West corner
 On the 19th Nov the men arrived from the ESB (Electricity Supply Board) to put up the pole. The pole will be erected on the southern edge of my land.

It took two men and a 10t digger with a great claw attachment about half and hour to install it. The claw was used to lift the pole and dig the hole.


The Claw attachment on the digger.

The Digger carrying the pole.
Digging the hole.
On the 19th Nov the block layers finished the West wall up to gable level.


North-West corner
The scaffolding is now being added to the outside of the house. This will be used at first to help install the roof trusses.


View of the South-East corner, More cills have been fitted.
On the 21st Nov the block layers capped the North side wall ready for the wall plate to be installed.


The blocks closing the cavity being finished on the North Wall
Pat the carpenter arrived on 23rd Nov to fix the timber wall plates and to start on the roof trusses


Fixing the wall plate to the South Wall with ESB pole in the back ground


The wall plate, the green tint is the wood preservative. The string line is used to confirm straightness.
The wall plates are lengths of 100mm x 75mm timber that the roof trusses will rest on. These timbers are bolted to the top of the blockwork closing the cavity.

All the walls are all partly "scudded" this is a mix cement and sand with is flicked on to the block work to provide a key for the "scratch coat" and final render coat. This "scudding" has to be done on the inside and outside walls


The "scudding" pattern can be seen on the walls
We are now ready for the roof trusses.