During the first few days of February the plasterer finished all the external rendering.
The garage looked really good with its final coat of render. The render had a much higher lime content which gave the render a much lighter, almost white colour.
 |
| A section of wall at the rear of the garage. |
 |
| The other section of rear wall. The first drier lighter section in the background. |
 | |||
| Garage fully rendered. |
 |
| The boundary wall with scratch coat waiting for final coat. |
We are having a plinth detail on the entrance way walls this has caused a bit of a talking point amongst my neighbours.
 |
| The western wing wall with the plinth detail. |
 |
| The extra large pier caps were also installed. The top black cable is for the lights. The bottom cables are for the intercom and camera. The cable right at the bottom on the side face is for the eye to stop the gates closing on pedestrians who may be near them. |
 |
| The front entrance walls with the scratch coat. |
 |
| The western wing wall completed with plinth detail. The plinth will be painted in a dark grey colour. The rest of the wall will be painted white. |
 |
| The front entrance way completed. The timber gates have been purchased but we are waiting for the special hinges to be made. |
The heavy duty armoured cables for the electric gates, lights, intercom and camera have been installed along the driveway. The cables had to be cut to 110m lengths and then installed in a trench, with sand at the bottom, to protect the cables. The trench was then filled with stone. Having the stone in the trench meant we could used it as a drain for the driveway.
 |
| The loops in the cable are for the driveway lights. |
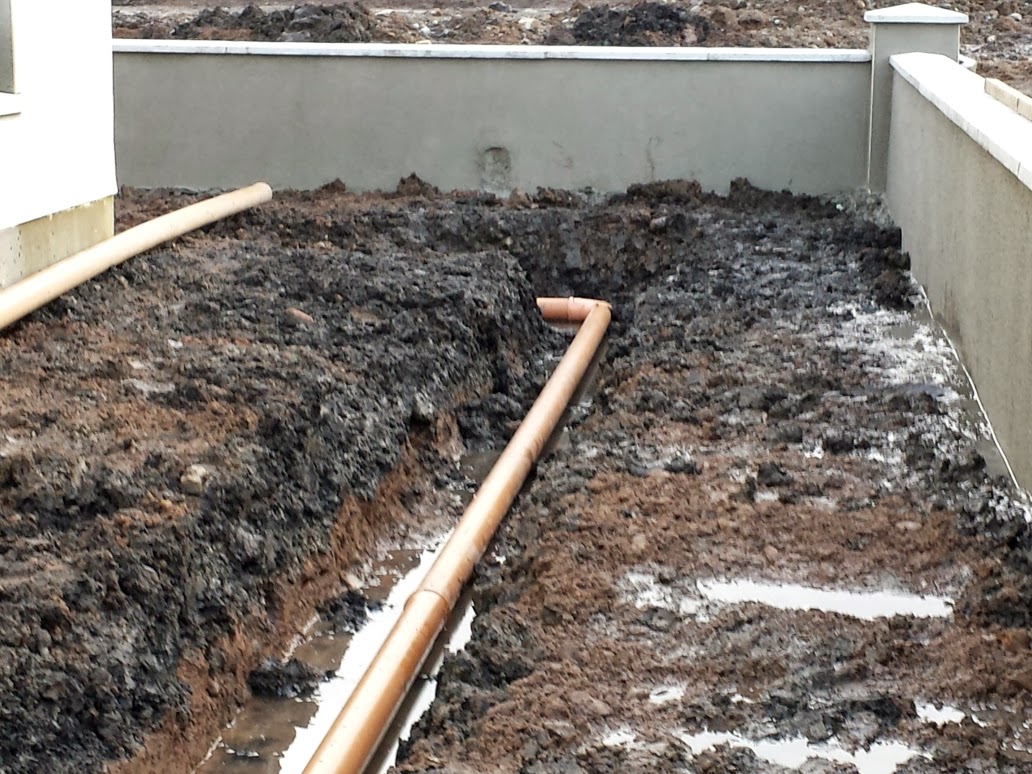
We started to put in the drainage between the house and the boundary walls. Also the rain water guttering from the house will also be attached to this drainage. All the water will then be diverted into the pond.
 |
| Holes were drilled into the top of the pipes at 10 12 and 2 o'clock positions. The water can then flow along the bottom of the pipes. |
 |
| The trench was then filled with clean stone. |
 |
| The trench and boundary wall. |
 |
| The trench and boundary wall on the south side. |
The drains are made with 125mm and 100mm plastic land drainage pipes sitting on a layer of clean stone with further clean stone over it. The stone was then filled to the top of the trench. A total of eight loads of clean stone was used. Very expensive.
 |
| A very deep drain which will take most of the water away from the house into a drainage ditch. |
 |
| The land drain running along the front of the peculation area. A loop of cable can be seen for another light. |
 |
| The drain running into the next field. The mud is a very deep in some places!! |
We purchased fresh timber for the stove. We should be able to use from next season when its dry. The amount of timber that we have we should be able to use for at least 3 or even 4 winter seasons.
 |
| The wood store is made from pallets |
 |
| This should last us for 3 to 4 seasons. Not bad for €480.00 |
No comments:
Post a Comment